BDSP Trainer ID RNG
Trainer ID (TID) RNG manipulation is primarily used for cosmetic reasons, such as finding a TID with a particular pattern or meaning. It is not required for manipulating specific spreads or manipulating Shiny Pokemon. This process be skipped if you are not interested in having a specific Trainer ID.
No longer interested? Click here to go back!In Brilliant Diamond/Shining Pearl the game determines the outcome of "random" events using a constantly advancing RNG seed. Using tools like PokeFinder and SysBot.NET we are able to predict the outcome of these random events and understand exactly when a desirable result will be produced and take advantage of this.
Moarencounterbots is able to track and monitor RNG seeds in real time as well as advance the RNG state until a given point, removing the vast majority of work that would otherwise be tedious. This allows the player to put their efforts into more important factors like hitting their target frame instead.
Figure 1 - SysBot Setup
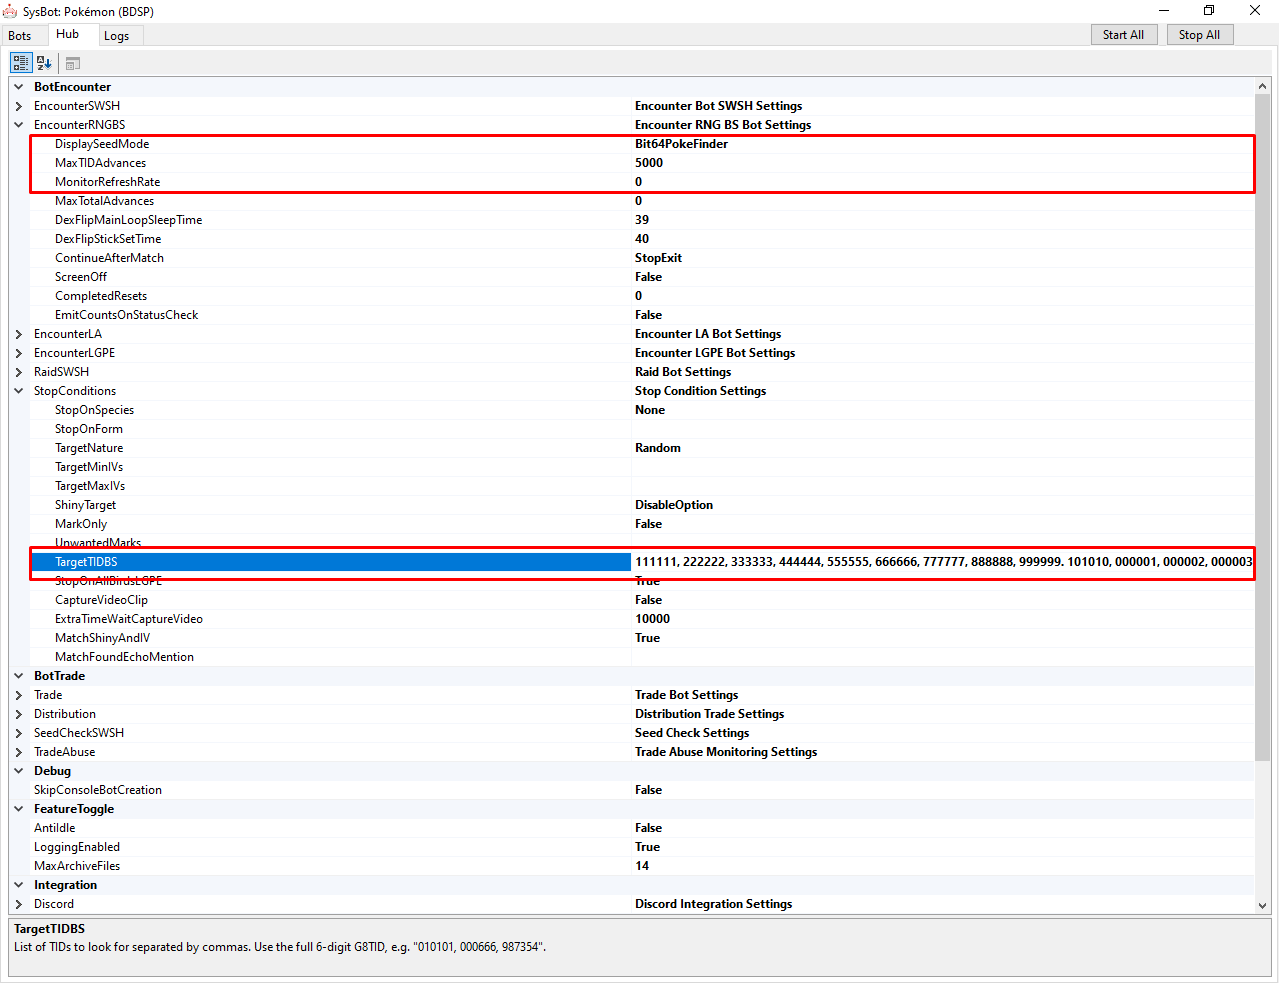
Opening the Hub tab displays the bot settings, here we can configure the bot to search for specific TIDs within any given number of advancements. Figure 1 displays a rough idea of what your settings should look like after proper configuration.
Settings Configuration
- Navigate to the
Hubtab, then open theEncounterRNGBSdropdown menu. - Set the
MaxTIDAdvancesto a suitable number (10,000 advances takes ~2 hours). - Set the
MonitorRefreshRateto 0 if you have not already done so. - Now open the
StopConditionsdropdown menu and navigate toTargetTIDBS. - Enter a list of acceptable TIDs, then close and reopen
SysBot.exe.
Acceptable TIDs should be added in the form of a comma separated list (111111, 222222, 333333 etc). Make sure you have entered your IDs in the correct format or it will not work.
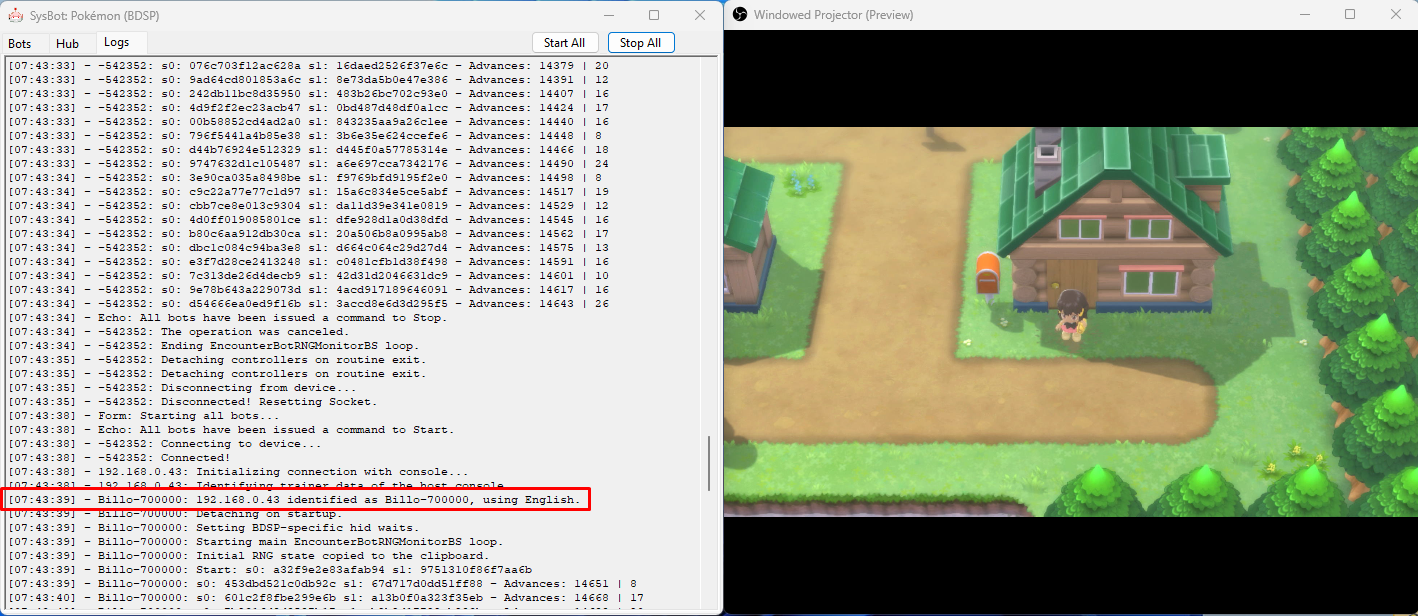
Figure 2 - Bot Added / Game Setup
After configuring your bot settings in the Hub tab and relaunching the program you will need to add the correct bot to the active bot list.
Settings Configuration
- Navigate to the
Botstab, right-click and remove any currently active bots as these may cause conflicts. - Type your Switch IP address into the assigned field, then open the dropdown menu on the right.
- Select
EncBotTIDBSand then click theAddbutton to add the TID bot to the list of active bots. - Open the game on your console with no save file loaded. You should now be on the language select screen.
- Disconnect all controllers (JoyCons, Pro Controllers etc.), then click the
Start Allbutton on SysBot. - Observe your console and the SysBot
Logstab to confirm that the bot is functioning as intended.
If done correctly you should now see that the bot has started to look for desirable TIDs, it will reset the game until a desired result has been found. If the bot has started and nothing is happening on your Switch screen this likely means a controller is still connected. Stop the bot and deactivate any controllers and try again.
Figure 3 - Target Found

Once the bot has found a desirable TID it will begin advancing the RNG state automatically until we are close to our target frame (typically 20 or less advances away). This is done by automating the process of giving your character a name and then selecting No, which advances the RNG state by 5 frames each time.
After advancing the RNG state the bot will pause the game by pressing the Home button. Being on the Home Menu will not advance the RNG state so there is no rush to immediately return.
Note - If communication with your console was disrupted in any way (e.g. connection issues) you can resume your progress by entering the Hub tab and setting TIDAdvanceOnly to True, then restarting the bot.
Figure 4 - Hitting Your Target

In the above image we can see that the bot has sucessfully advanced close to our target frame. In this example we are now 14 advances away from the target and the game is paused on the Home Menu. We now need to run EncBotRNGMonitorBS and manually monitor the RNG state until 14 advances have passed.
Step-by-Step
- Remove any currently active bots including
EncBotTIDBS. - Add
EncBotRNGMonitorBSto the list of active bots. - Click
Start Alland head over toLogstab. - Reconnect your controller, ensure it is functioning properly.
- Resume the game and wait and monitor the advances in the
Logstab. - Once you have reached your target frame, select a character model.
Using Figure 4 as an example we will need to press A on our desired character model once 14 advances have occured. TID is generated upon selecting a character model and will be locked in from this point onwards unless you back out of the naming sequence. Be sure to name your character correctly as failing this step will cause you to overshoot your target.
Figure 5 - Target Hit
We locked in our character model on advance 14 and named our character correctly. Mash through the rest of the introduction cutscene until you are standing outside of the players home in Twinleaf Town, then restart the bot to confirm that the correct TID has been hit.
Figure 6 - Result Found
We can see the correct TID inside the SysBot Logs tab, you can now save the game and start your playthrough with your desired Trainer ID!