SwSh Item RNG Guide (RETAIL)
Introduction
Item RNG manipulation offers an efficient method for farming rare items and in-game currency. By accurately predicting potential outcomes, players can maximize the effectiveness of their farming efforts, ensuring optimal use of time when farming for rare in-game resources by removing the element of luck.
| RNG Type | Description | Requirements |
|---|---|---|
| Cram-o-matic | Farm rare Poké Balls (Apricorn, Safari, Sport) and Alcremie Sweets in the Isle of Armor Dojo. |
|
| Loto-ID | Farm Master Balls, PP Max, and Rare Candies at any Pokémon Center using Pokémon Trainer IDs. |
|
| Watt Trader | Farm rare Poké Balls (Dream, Beast) at Snowslide Slope in the Crown Tundra. |
|
| Digging Pa | Farm Watts with Digging Pa at Warm-Up Tunnel in the Isle of Armor. |
|
Setup and Overview
Tools and Applications
Installation Instructions
- Download
.NET 10.0and run the setup wizard until complete. This is a required program dependency. - Download and extract
owoow.zipinto a fresh, empty folder. - Run
owoow.exeto ensure the program opens without errors.
RNG Tool Overview
Figure 1 - Owoow Overview
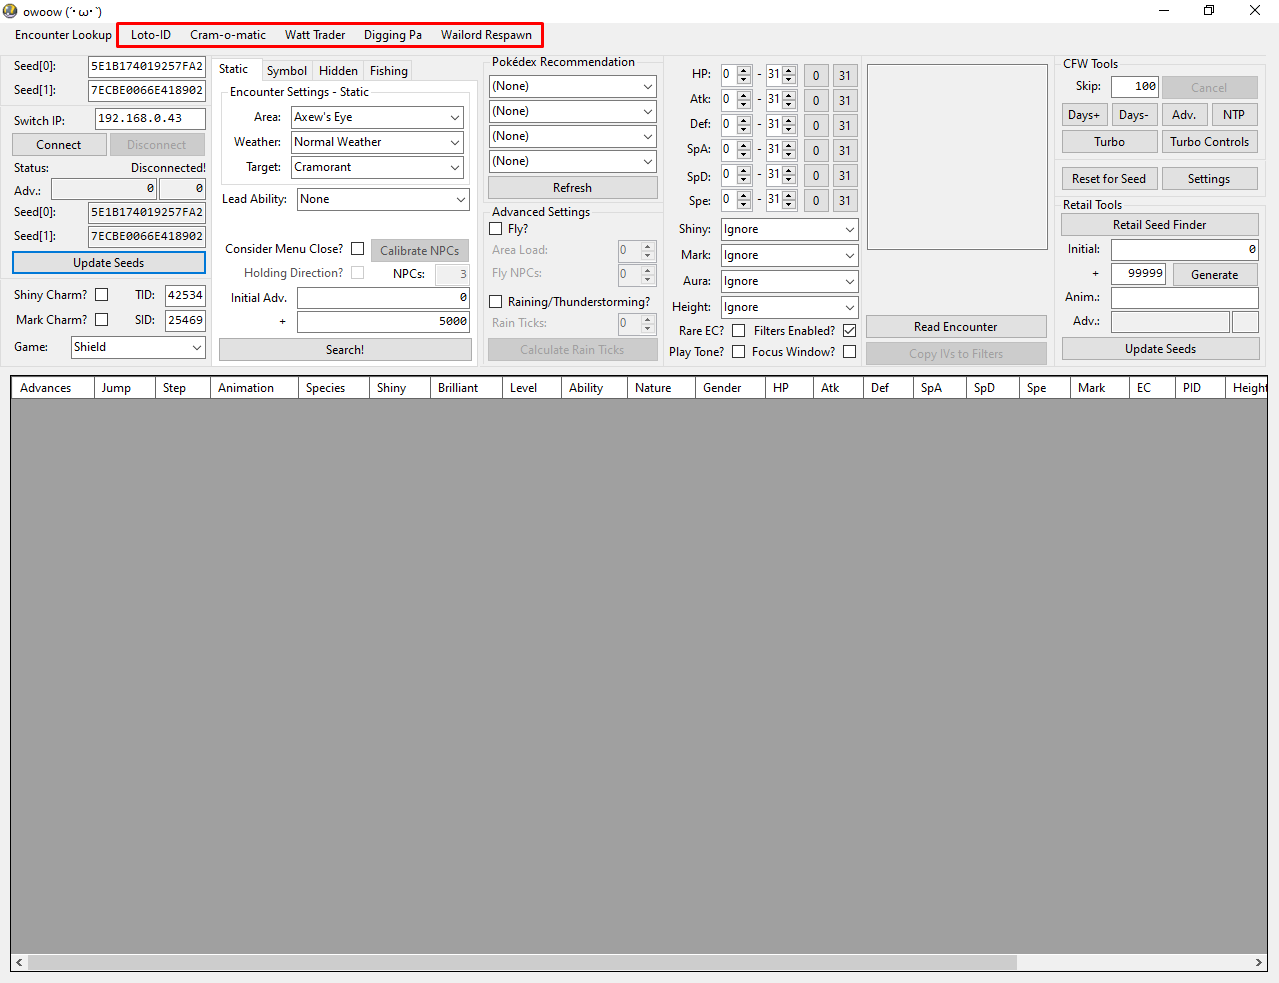
On the main window of owoow, you should see a navigation bar at the top of the program with multiple button options. Each button opens a tool for a type of item RNG manipulation.
Button Overview
- Loto-ID - Used for manipulating the Rotom Lottery.
- Cram-o-matic - Used for manipulating the Cram-o-matic.
- Watt Trader - Used for manipulating the Watt Trader.
- Digging Pa - Used for manipulating Digging Pa.
- Wailord Respawn - Used for respawning the Isle of Armor Wailord.
Although Wailord Respawn is not directly related to item RNG manipulation, it will be included in this guide as the underlying concepts are similar.
The Basics
Seed Finding and Seed Monitoring:
Learn how to find your current seed on retail hardware, and understand how to identify your current RNG state at any given point. Understanding these concepts is crucial for players on retail hardware.
Continue to finding your seedAdvancing the RNG State
Explore the various techniques used to advance the RNG state. Some actions advance the RNG state slowly, some will advance in a predictable manner, and others will cause the state to advance in a rapid and unpredictable manner.
Continue to advancing the RNG stateNPC Calibration
Using menu close prediction to advance the RNG state in a predictable manner. This essentially guarantees success in hitting the correct target frame. Menu close prediction is the preferred method and will be used extensively throughout the guide, so make sure you have a good understanding of how it works.
Continue to NPC calibrationPicking An RNG Type
CRAM-O-MATIC! LOTO-ID! WATT TRADER! DIGGING PA! WAILORD RESPAWN!