BDSP RNG Manipulation (CFW)
Introduction
RNG manipulation in Brilliant Diamond/Shining Pearl is used to control the details of upcoming encounters/gifts/eggs. It is possible to predict values such as IVs, Nature, Shiny Status, Size (Jumbo/Teensy Mark in SV), Gender and more! It is also possible to manipulate your Trainer ID for cosmetic purposes. The table below contains information about the types of RNG, provides example images, and provides details of each RNG type.
| RNG Type | Description |
|---|---|
| Static |
Encounters initiated by pressing the ExamplesLegendaries, Mythicals, Drifloon, Spiritomb, Rotom, Honey Tree. |
| Wild |
Encounters initiated at random in grass/caves/water, or by using Honey/Sweet Scent. ExamplesLegendaries, Mythicals, Drifloon, Spiritomb, Rotom, Honey Tree. |
| Fishing |
Encounters initiated by throwing your fishing rod into a body of water. ExamplesAny case where the player has used the Old/Good/Super Rod in a body of water. |
| Gift | Pokémon or eggs received from NPCs or through Mystery Gift distribution feature. |
| Eggs | Eggs received from the Day-Care couple in Solaceon Town (NOT NPC EGGS). |
| Underground | Encounters initiated by entering a cave inside the Sinnoh Grand Underground. |
| Poké Radar | Encounters initiated by using the Poké Radar and entering a shaking grass patch. |
| Trainer ID | Your 6 digit Trainer ID, usually manipulated for cosmetic purposes. |
Software Installation & Setup
Tools and Applications
Installation Instructions
- Download
PokeFinderand extract the contents of the download to a clean, empty folder at a known location on your computer. - Download
SysBot.NET - Moarencounterbotsand extract the contents of the download to a clean, empty folder at a known location on your computer. - Download
PokeViewer.NETand extract the contents of the download to a clean, empty folder at a known location on your computer. - Download
sys-botbaseand extract theatmospherefolder to the root of your Switch SD card, then reboot the console into your chosen CFW environment. - Confirm that PokeFinder, SysBot.NET and PokeViewer.NET all open correctly with no issues, resolve any issues before continuing to follow the guide.
Finding Switch IP
- After launching your CFW environment, enter the Homebrew Menu by clicking the
Albumbutton on the Switch home screen. - Press the
Ybutton on your controller. This will cause a pop-up to appear. Your console IP will be visible here. - Memorize your IP or take note of it somewhere on your computer. This IP address will be used to connect to programs like SysBot.NET and PokeViewer.NET
- Attempt to connect to PokeViewer.NET by entering the overworld in-game, typing your local IP address into PokeViewer.NET, then clicking the
Connectbutton. - If done correctly your save file information (OT and IDs) will be present on the passport section of the main window.
DISABLING GAME MODS AND CHEATS
You will need to remove all mods or cheats for the game you are playing before proceeding. Mods/cheats can alter the RNG of the games and cause RAM reads to fail. Switch mods/cheats are stored in the atmosphere/contents directory on your SD card. This folder is typically empty on a fresh installation of Atmosphère.
Methods for Disabling Mods/Cheats
Any of these methods can work to disable mods/cheats. You should select the best one for your use case.
- Rename the
atmosphere/contentsfolder to something else, such asoldcontents. This will allow you to keep everything you previously installed. You can simply rename the folder back when done. - Delete the
atmosphere/contentsfolder. This may be a good option if you have many files in this directory that you do not recognize and you want to clean out your SD card. - Delete specific mods/cheats from the
atmosphere/contentsfolder. This requires you to know which title ID corresponds to what. - If you wish to keep the
atmosphere/contentsfolder intact, you can holdLevery time you boot the game.
Note - Some sys-modules that are not necessary for these tools can still cause interference if they are present on your Switch. If you are still experiencing issues, remove all unnecessary sys-modules that were not required by this guide.
Program Overview
Figure 1 - PokeFinder Overview
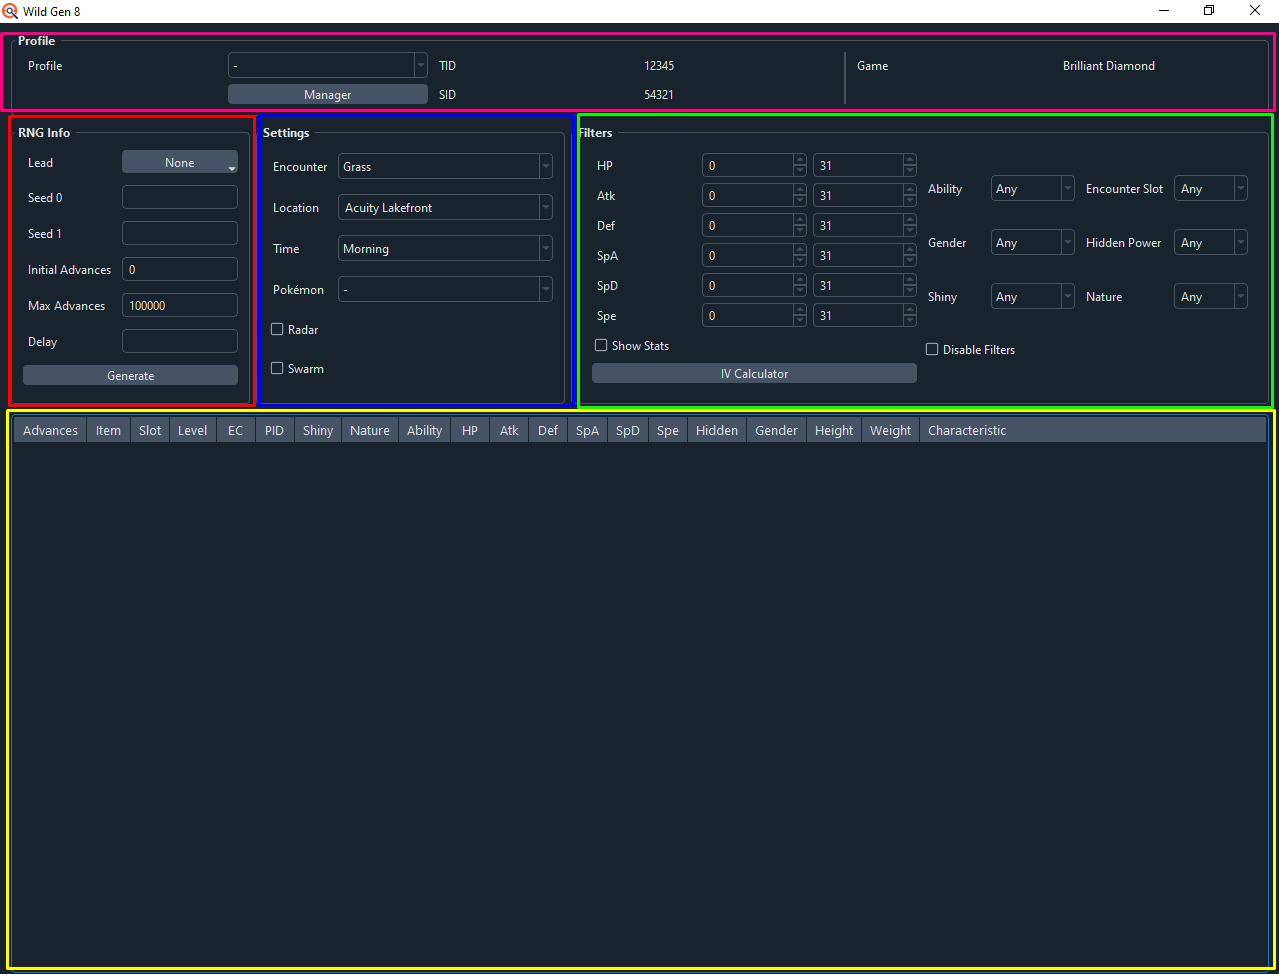
PokeFinder is a tool used to calculate upcoming advances based on your current seed. When launching the program for the first time a compact window with multiple tabs will appear, we will be using the Gen 8 tab. Clicking on any of the buttons in this section will open a larger window which will be referred to as the "main window" for the purposes of this guide. Each of the main window interfaces follows a similar layout and functionality.
Main Window Layout
- Left Side - Search conditions, type of encounter, seed input & # of advances.
- Center - Pokémon details, such as species to hunt or parents for egg encounters.
- Right Side - Set search filters for desired results (e.g. shiny or high IV targets).
- Top - Manage profiles, input save file information.
- Bottom - Display all results that match the given search perameters.
Profile Setup
Before performing any RNG manipulation you will need to configure your PokeFinder profile correctly. This ensures the tool provides accurate search results and is especially important for shiny egg RNG. If you plan to manipulate your trainer IDs you can skip this section for now and return once your desired IDs have been acquired.
- Launch BDSP and enter the overworld, then connect to PokeViewer.NET. You should now see your trainer information visible on screen.
- PokeFinder expects the 5 digit internal IDs, these are the IDs wrapped in brackets
(12345). DO NOT USE THE VISUAL IDs. - At the top of the PokeFinder window, click the
Managerbutton to open the Profiles subwindow. Here is where we will enter our save file information. - Click
Newand give your profile a name, then select the correct save version in the dropdown menu (e.g Brilliant Diamond). - Copy or manually enter your 5 digit TID and enter it into the assigned field, then repeat this process with your 5 digit SID.
- On the right you should see multiple checkboxes, these boxes should be checked according to your save file progress:
- Select the
Shiny Charmcheckbox if this item is present in your save file. - Select the
Oval Charmcheckbox if this item is present in your save file. - Select the
National Dexcheckbox if you have gained access to the National Dex. - Click
Donethen make sure your profile is selectable in the dropdown menu on the main window (visual demonstration).
Figure 2 - Moarencounterbots Overview
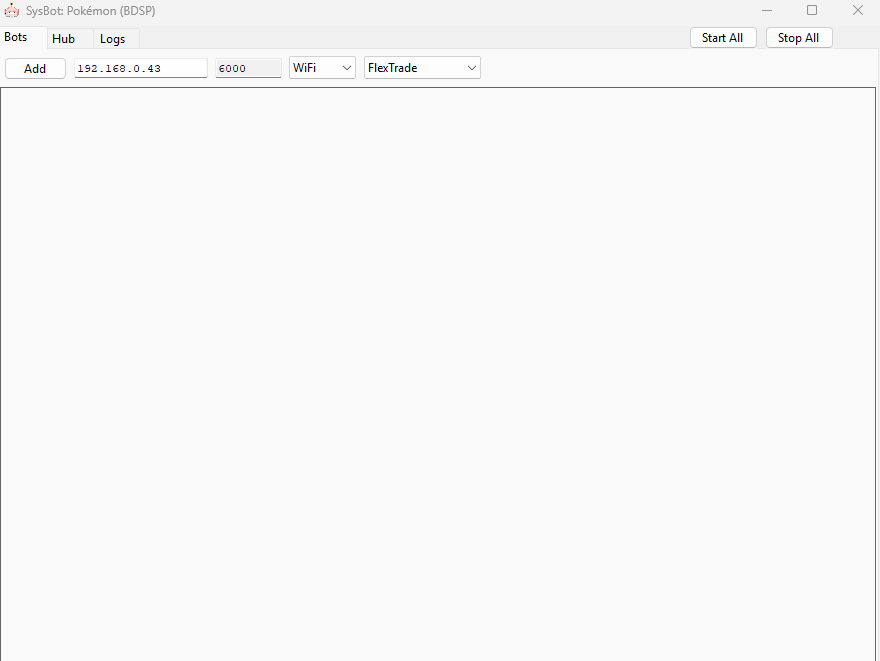
Moarencounterbots is used to monitor the RNG state and automate RNG advancements for distant targets. By default, the program is configured to work with the most recent Switch game, which is not BDSP. To fix this issue you will need to change the Mode by doing the following:
Initial Bot Configuration
- Open
SysBot.exeonce, then close it. This will generate a file namedconfig.jsonin the same folder. Make sure all instances ofSysBot.exeare closed before moving on. - Open
config.jsonin a text editor like Notepad. - Change the
Modeto 2 (this represents BDSP) and save the change. Close the text editor. - Launch the program again. You should now see BDSP in the program header.
- Navigate to the
Hubtab and expand theEncounterRNGBScategory underBotEncounter. - Change
DisplaySeedModetoBit64PokeFinder. - Ensure that
MonitorRefreshRateis set to0. - Closing the program will automatically save these settings.
Bot Tabs
Bots- Add/remove or start/stop the bots. Available bot programs are listed in the dropdown menu on the right.Hub- The central hub for settings to control how your bot operates.Logs- Monitor any currently active bots.
Bot Types
EncBotRNGMonitorBS- Monitor your RNG state in real time.EncBotCopySeedBS- Copy your RNG seed to clipboard at any point.EncBotDexFlipBS- Automatically advance the RNG state until a given point by flipping between PokéDex pages.
Visit the official Moarencounterbots Wiki for more information about program features.
Figure 3 - PokeViewer Overview
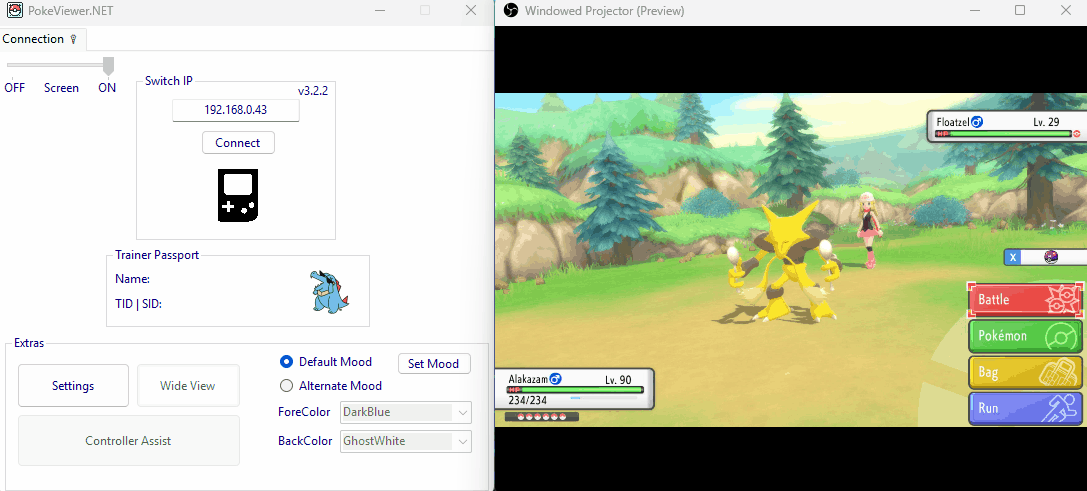
When launching PokeViewer.exe we can see the connectivity functionality is similar to Moarencounterbots. PokeViewer.NET is used to read the details of a Pokémon during a battle or found inside boxes which is important for troubleshooting in the event that a target frame is missed and some calibration is required.
Main Features
Connection- Used to connect to your console and view trainer information.EncounterView- Used to view the details of an opposing Pokémon during a battle.BoxView- Used to view the details of a Pokémon located inside boxes.
Visit the official PokeViewer Wiki for more information about program features.
The Process
TRAINER ID (TID)! STATIC ENCOUNTERS / GIFTS! WILD ENCOUNTER! FISHING ENCOUNTER! EGG REDEMPTION! GRAND UNDERGROUND! POKERADAR!
Note - The guide for Poké Radar RNG manipulation is serparate and comes with its own set of initial setup instructions.