Menu Close Prediction
This page contains information about calibrating your NPC count and using that knowledge for the best possible chance of hitting a target frame/Pokémon. Menu close prediction is used extensively throughout this guide, so it is very important to have an understanding of how to use the technique to your advantage.
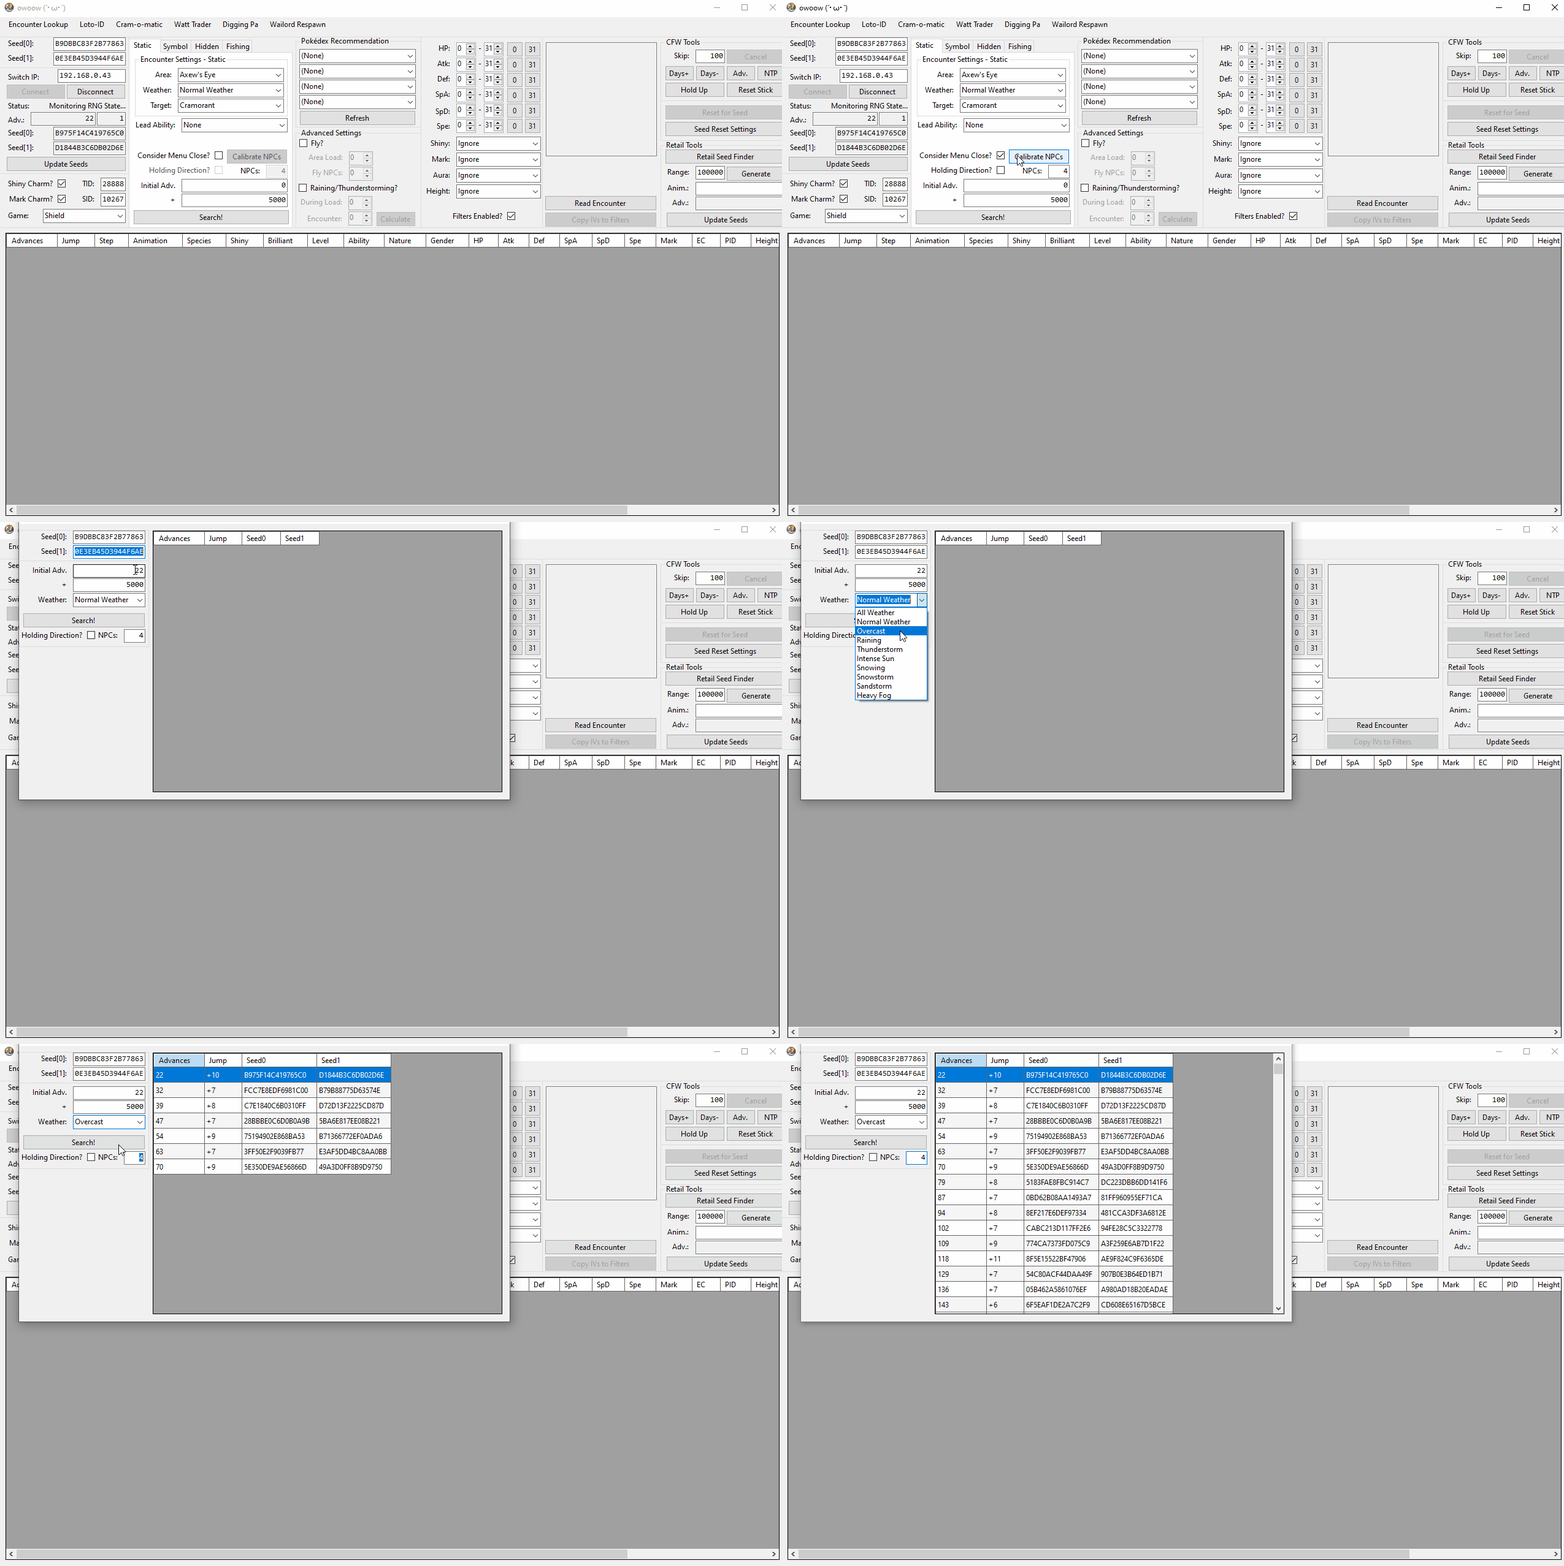
Figure 1 - Menu Close Demonstration

In Figure 1, the console is connected to owoow and the game is paused by opening the X Menu. The menu was then closed and reopened a few times, which caused some RNG advancements each time. This demonstrates the process of performing the menu close action.
The number of advances consumed in total can be found in the larger box on the left, and the number consumed from closing the menu once will be indicated separately by the box on the right.
Figure 2 - Menu Close Advances Viewer

Clicking the Consider Menu Close? checkbox on the main window enables the Calibrate NPCs button. Clicking this button opens a subwindow, which is where we will determine the number of NPCs currently active in our location.
Upon opening the subwindow, we can see that the current seed and number of initial advancements have been entered automatically. If you have not filled in the Encounter Settings in the main window to match your desired target, you will need to manually set your weather condition.
It is highly suggested that you do not have the Holding Direction? checkbox ticked since this would require you to be holding a direction while calibrating. Doing so does not add anything but difficulty to this process.
Figure 3 - Finding NPC Count

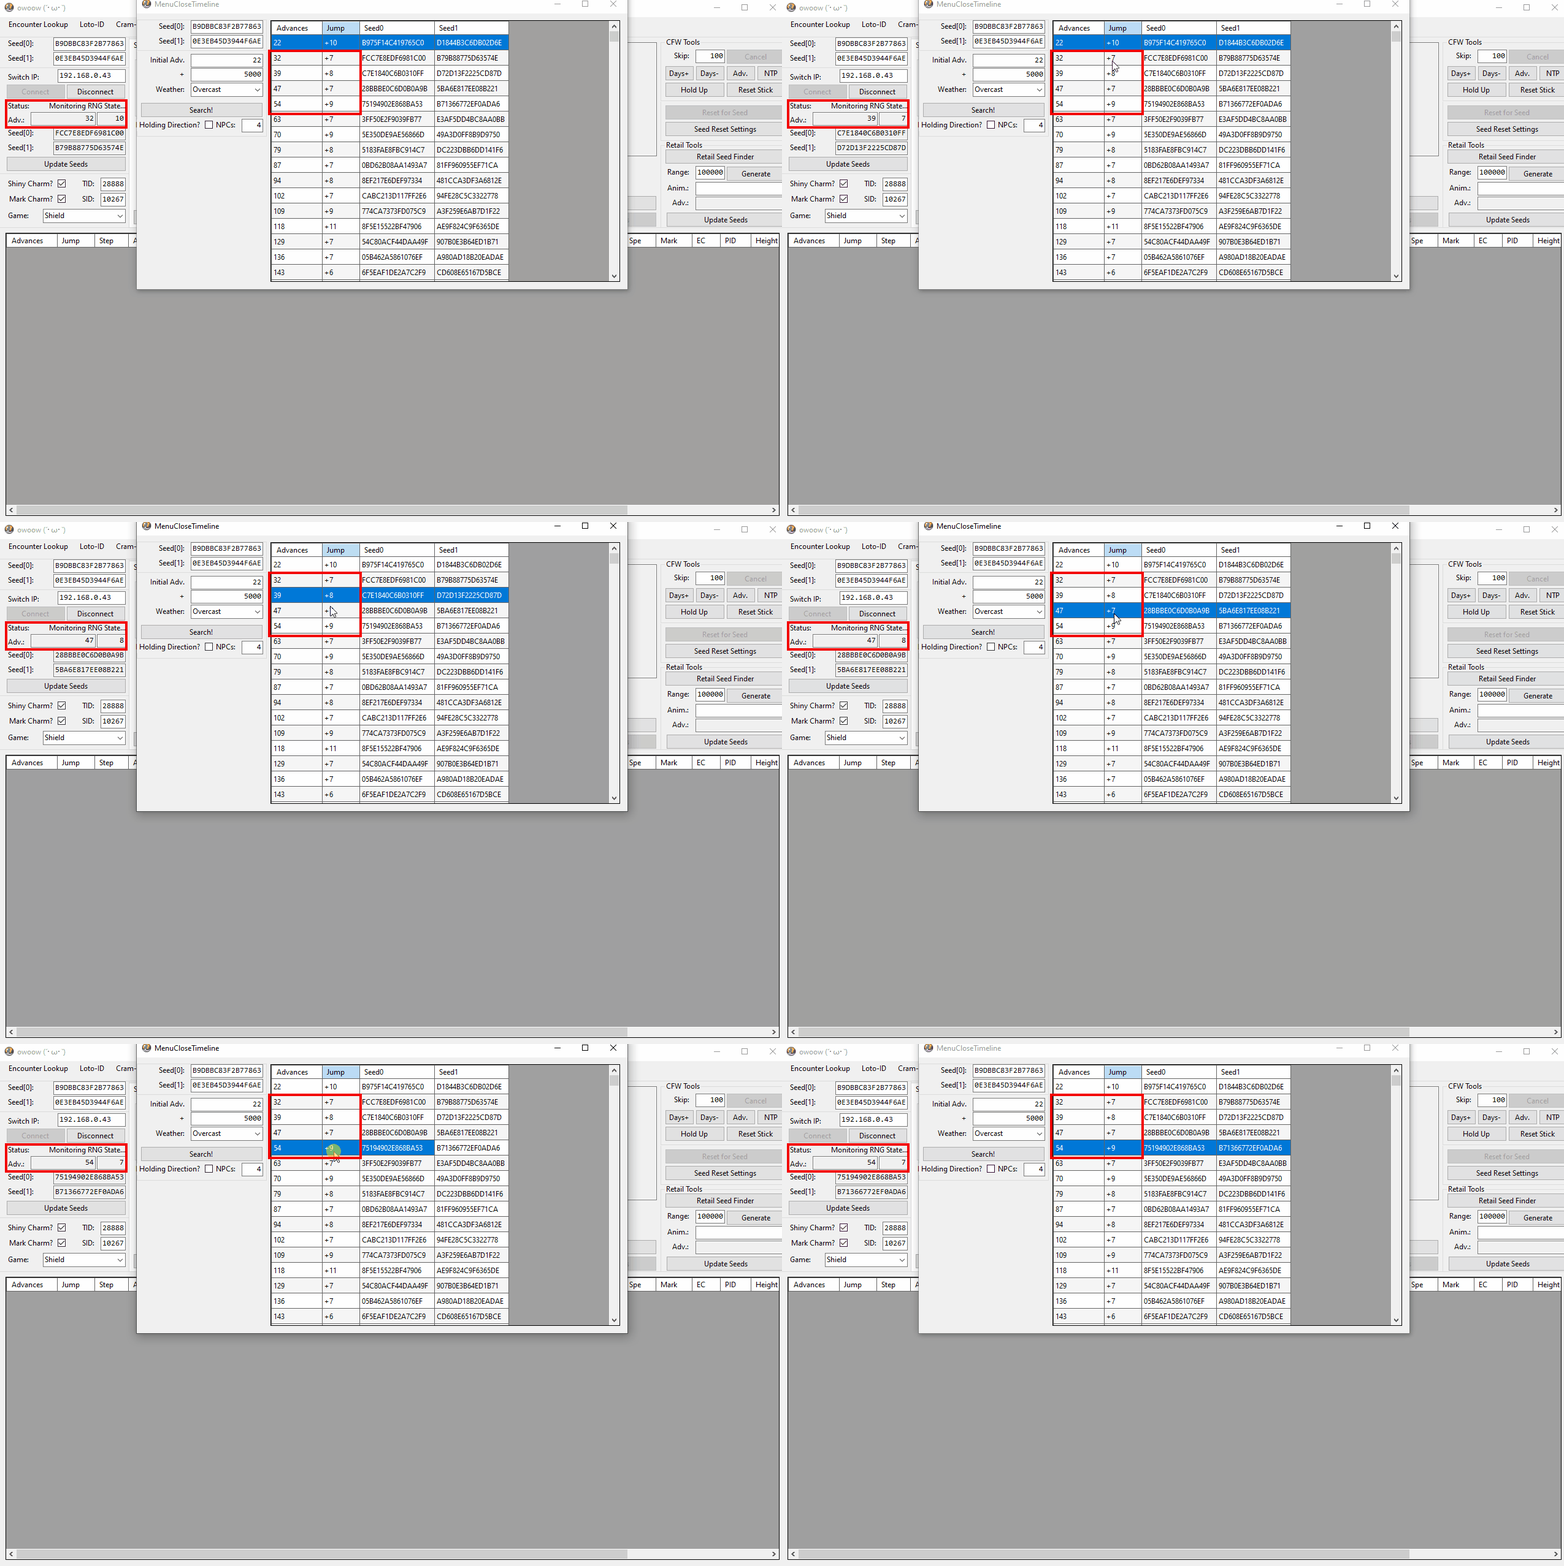
After setting the appropriate weather condition and clicking Search, a table will appear. Close and reopen the X Menu once by pressing B and immediately X, then note the number of advances consumed during this action (displayed in the main window). Now, look at the Jump column in the table, highlighted in red in the above image.
Change the value in the NPCs field until you see the correct number of advances in the first row of the table. In this example, 10 advances were consumed from closing and reopening the X Menu, so we will tweak the NPCs field and click Search until we see +10 advances in the Jump column of the table, which should then give us the current NPC count.
We strongly suggest that you use B and X to calibrate NPCs, not X and X. The reason for this is that pressing X twice too quickly can cause 0 advances, which would mislead you into thinking that there are 0 NPCs.
Figure 4 - NPC Count Found

The number of advances matches the expected value for an NPC count of 4. Close and reopen the X Menu a few more times while monitoring the number of consumed advances to ensure that the Jump column of the table aligns correctly. This process will confirm that the calibrated NPC count is accurate.
After a few attempts, we can see that the Jump value aligns with what is expected for an NPC count of 4. Keep in mind that NPC count can vary day-by-day and if you change positions. If a day advances or you move to another position, you may need to recalibrate the NPC count.