Poké Radar Encounter RNG
As mentioned earlier in the guide, Poké Radar chaining grants guaranteed IV bonuses at specific chain lengths and increases the shiny rates up until a chain of 40. It would normally be very difficult to reach such high chain lengths even with perfect gameplay, so we use RNG manipulation to improve our chances of getting there. We can use these IV bonuses alongside a high chain length to more easily encounter high IV Shiny Pokémon.
Figure 1 - Shiny Patch
Before proceeding, you should decide if you want your target Pokémon to be Shiny. If you do want the Pokémon to be Shiny, you will need to generate a shiny patch using the Poké Radar. This is done with the following steps:
Step-by-Step
- Stand in the grass that you are hunting in and use the Poké Radar. Check if any of the new shaking grass patches are shiny patches.
- If no shiny patch was produced, walk 50 steps to recharge the Poké Radar and use it again. Make sure to avoid:
- Walking into a shaking grass patch.
- Encountering a random wild Pokémon. Use Repels and a high-level lead Pokémon.
- Repeat until a shiny patch appears. Carefully walk toward it using the D-Pad and stop on an adjacent tile.
If you do not care about the Shiny status of your Pokémon, you can simply use the D-Pad to walk toward any shaking grass patch and stand on an adjacent tile.
Once you are standing next to the shaking grass patch you plan to use, press the HOME button to minimize the game and pause RNG advancements. You should be looking at the Switch Home Menu. Click Update Seeds on ARSE.
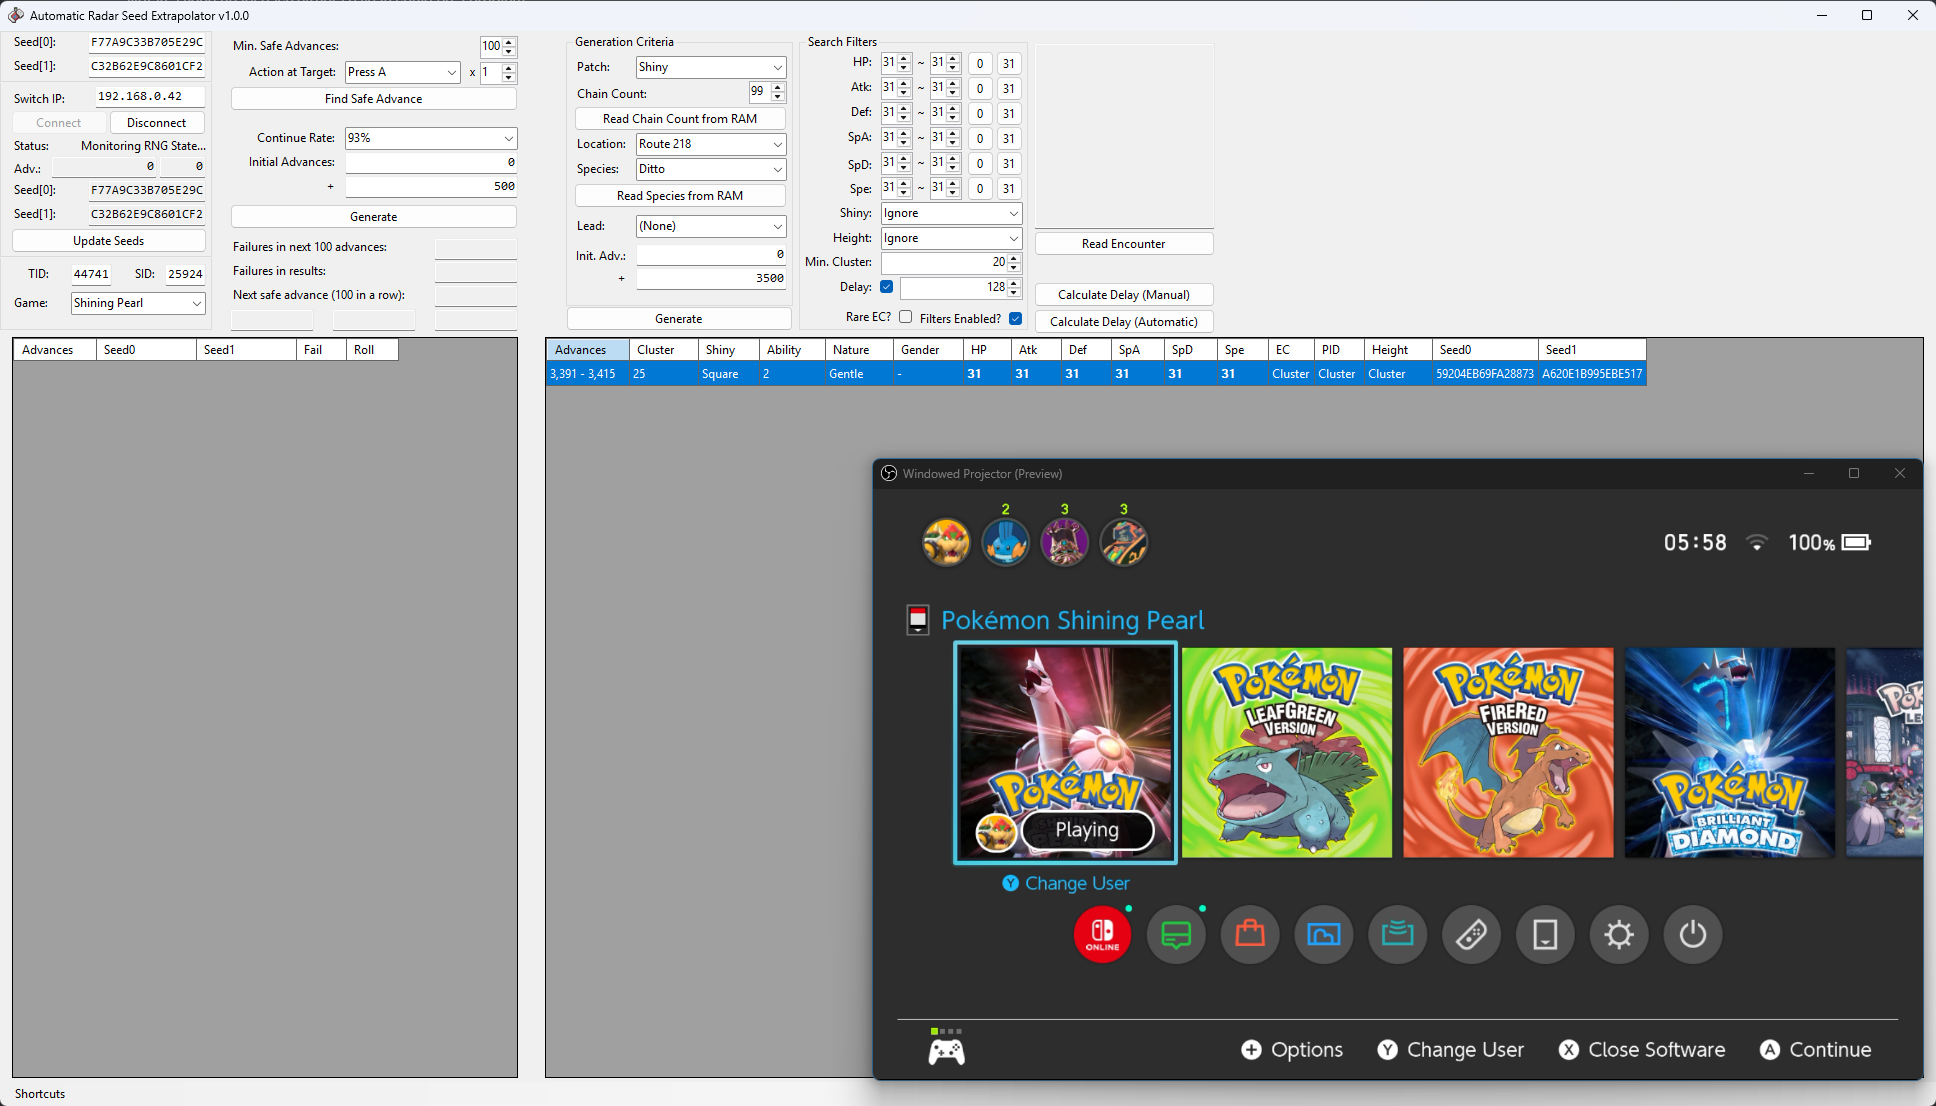
Figure 2 - ARSE Setup
You will now need to fill in the program settings for your current in-game status, including the type of grass patch you are targeting, chain length, location, species, and search filters.
Step-by-Step
- In the
General Criteriasection, set thePatch:to match the grass patch you are facing in-game. - Read your chain count from RAM or manually enter your current chain length inside the
Chain Count:field. By default this is set to 99. - Set the
Location:to match your current in-game location. If you do not know your current location, check the in-game map. - Set the species to the one you are currently chaining. This can also be read from RAM using the
Read Species from RAMbutton. - Set your
Leadin the dropdown if you are using a Pokémon with the Synchronize ability to control Nature. - Enter your search criteria in the
Search Filterssection. In this example, we are searching for any 6IV. - You do not need to define
Shiny:here if you are manipulating a shiny patch. Simply leave this section onIgnore. Rare EC?should only be checked if you are hunting Dunsparce and want a Three-Segment Dudunsparce in future games such as Scarlet/Violet.- You do not need to define
Height:unless you are specifically searching for a Pokémon that qualifies for the Jumbo Mark or Mini Mark in future games such as Scarlet/Violet. - Set the
Min. Cluster:to as high a value as possible that still returns a result. Larger clusters improve your chances of successfully hitting a target, but make the search more difficult. For example: - On a chain of 99, it is very easy to find clusters of 10 or higher because of the guaranteed IVs.
- On lower chain lengths with fewer guaranted IVs, it is harder to find large clusters, so you should set this to a lower value or increase your search range to find results.
- If you are hunting for a rare EC Dunsparce, consider lowering the cluster size to 2-3 AND increasing your search range.
- Search range can be increased by adjusting the
+field at the bottom of theGeneral Criteriasection. - Enter your delay into the
Delay:field. This should generally be the lowest number or most consistent number from your delay table.
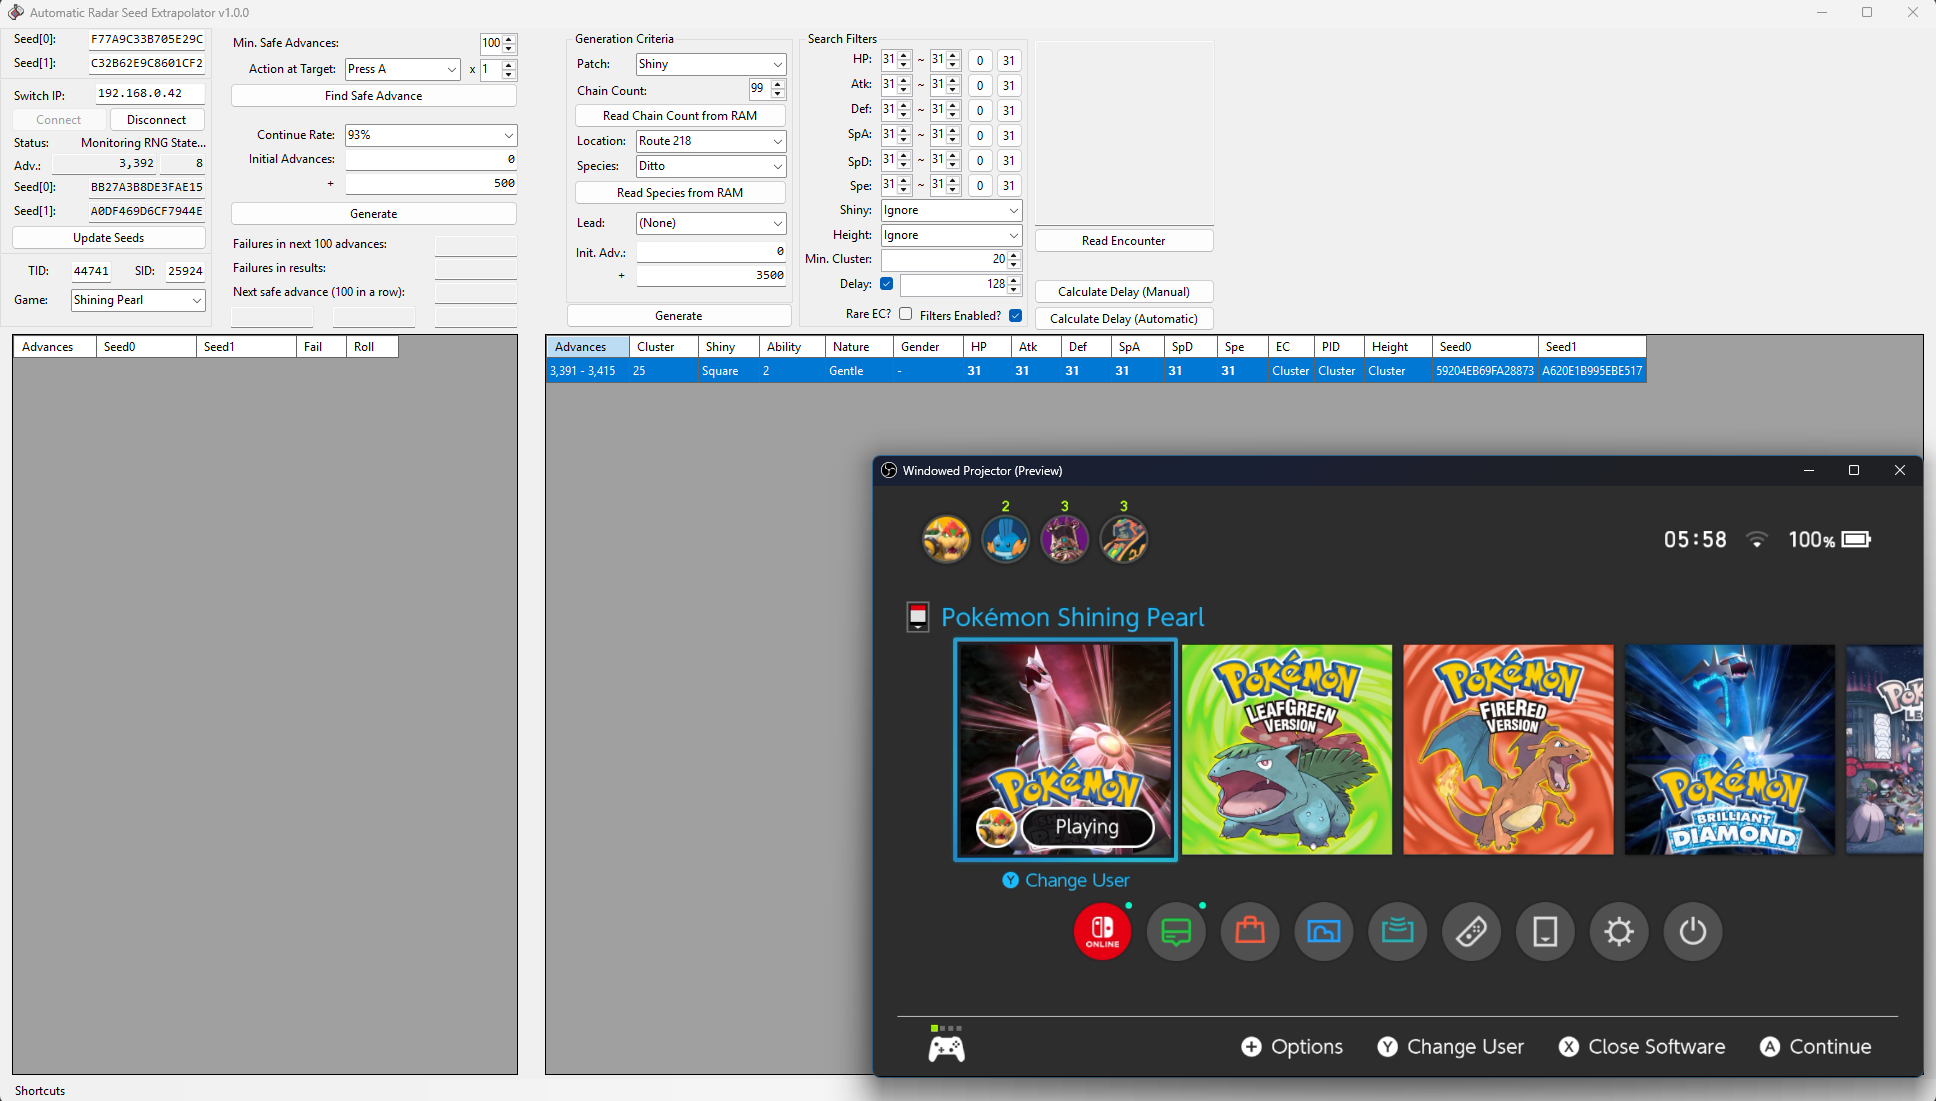
Figure 3 - Target Found
We found a cluster of 25 advances that will generate a 6IV Ditto on advance 3,391-3,415 In any case, we should aim for the very start of the cluster for the best possible chance of hitting the target. In this example we will aim for as close advance 3,391 as possible.
Step-by-Step
- Make sure you are connected to ARSE while the game is minimized. You should be on the Switch Home Menu. Search for your target frame again if necessary.
- Advance the RNG state until you are around ~1000 advances away from your target. The method you should use to advance the RNG state depends on how far away from the target you are.
- If you are under 10,000 advances away from your target you can simply let the RNG state advance naturally by standing in the overworld.
- If you are over 10,000 advances away from the target, it may be in your best interest to use Pokédex scrolling to advance the RNG state quickly.
- If your target is millions of advances away, consider using SysBot.NET - Moarencounterbots to automate the process of advancing the RNG state using Dex Flip.
- The usage information for Dex Flip can be found on the official Moarencounterbots wiki or in the general BDSP RNG manipulation guide.
- Once you are around 1,000 advances away from your target, minimize the game again so you are back on the Switch Home Menu. Click the
Update Seedsbutton on ARSE and search for your target again. - Slowly inch towards your target frame by quickly pressing the
HOMEbutton twice. This will quickly resume the game and minimize it again. - Keep a close eye on the
Adv.field of ARSE to avoid overshooting your target. Note that this may not always be possible to avoid in locations where the RNG state is advancing very quickly. - Once you have landed on your target frame, keep the game paused on the Switch Home Menu.
In some cases, it will not be possible to land directly onto your target frame due to the rate at which the RNG state is advancing. This should be treated as a failure. You should find a new target frame and repeat this process again.
Figure 4 - Target Frame Hit
We were able to land safely within our cluster (cluster was advance 3,391-3,415 and we hit advance 3,392, giving us 24 frames of leeway). Now it is time to initiate the encounter. Hold the correct direction on your joystick so that you will walk into the grass patch. For example, if you are standing to the left of the shiny patch, hold the joystick to the right. Then, while holding the joystick, press the HOME button to resume the game and trigger the encounter.
Figure 5 - Initiating the Encounter
We have now initiated the encounter! We can use the Read Encounter button on ARSE to confirm the internal details match what we expect. The details show that we are in battle with a 6IV Shiny Ditto, so we have successfully hit the target frame!