Alternative Methods (Max Raid)
This section aims to provide alternatives to PokePiaSWSH. This page should only really be used if you have exhausted all the possible troubleshooting options to get PokePiaSWSH working.
Figure 1 - PKHeX/LiveHeX
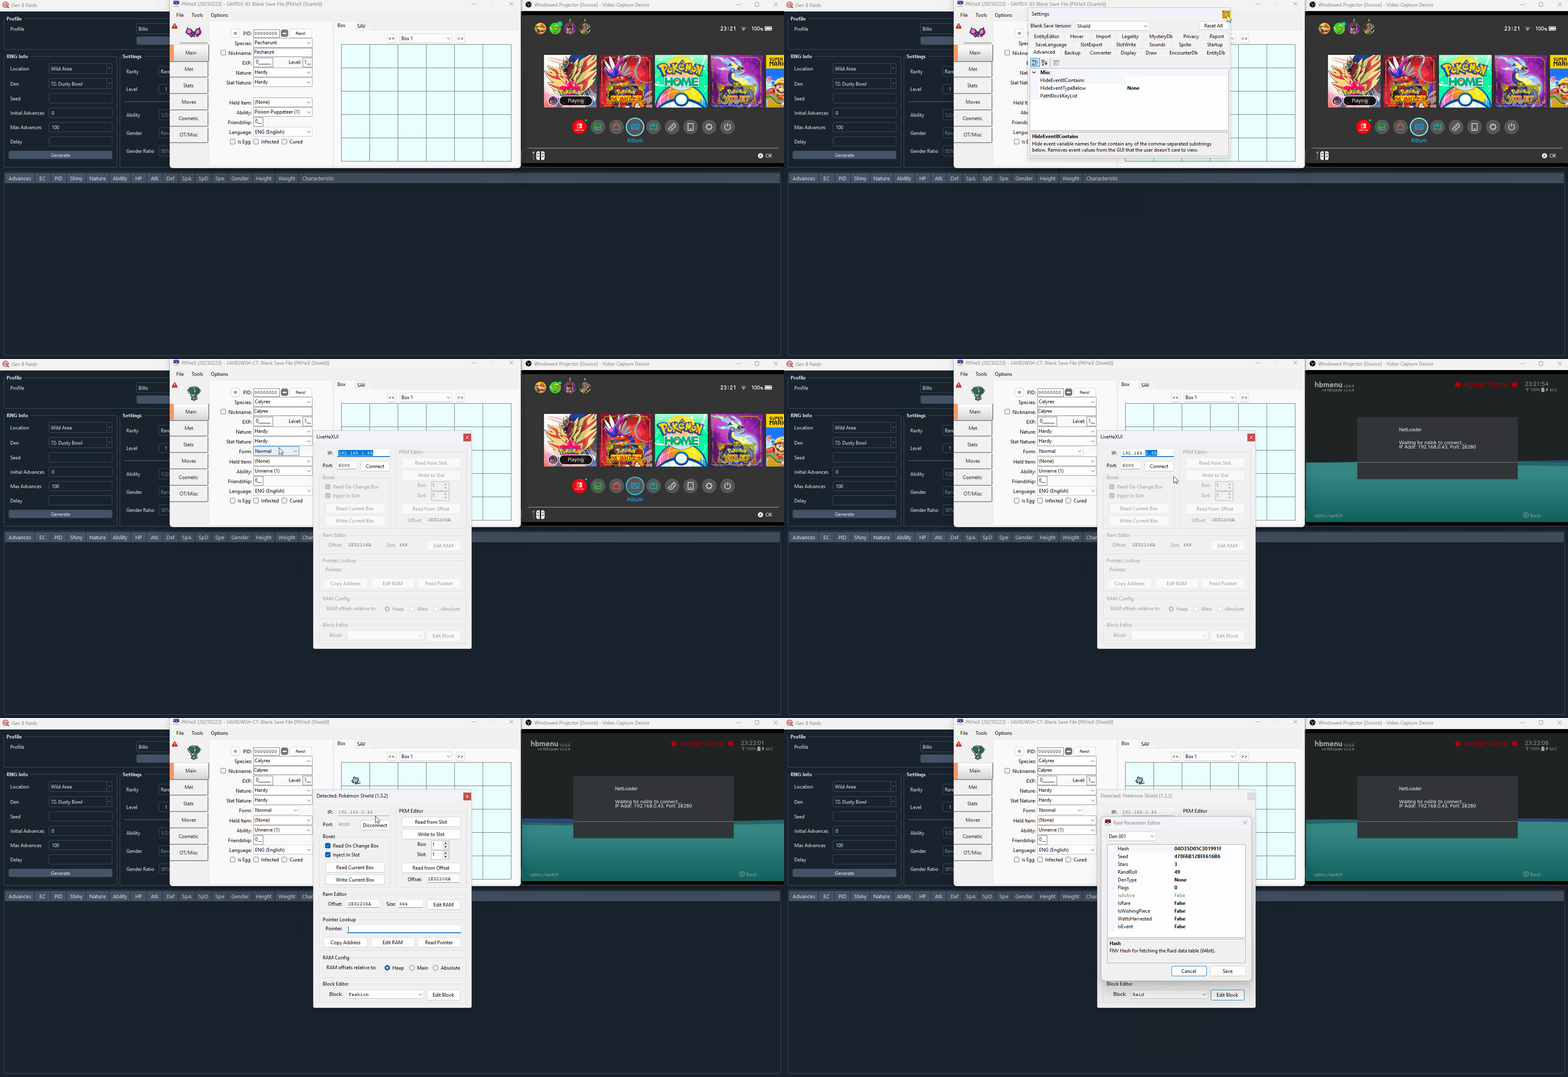
LiveHeX is a feature of the Auto-Legality Mod PKHeX plugin that is used to read the details of Max Raid dens while we are playing the game. We connect to LiveHeX using sys-botbase.
Required Tools
Installation Instructions
- Refer to the official Auto Legality Mod documentation for PKHeX + Auto Legality Mod installation steps.
- Extract the contents of the sys-botbase download to the root of your Switch SD card.
- Extract the contents of the ldn-mitm download to the root of your Switch SD card.
- Reboot your console into your chosen CFW environment.
LiveHeX Connectivity
- Open PKHeX, then navigate
Options->Settingsand set yourBlank Save Versionto the game you are playing (Sword or Shield). - Open the Homebrew Menu on your console, then press the
Ybutton to display the local IP address of your console. - Close the subwindow, then navigate to
Tools->Auto Legality Mod->Open LiveHeXto open the LiveHeX subwindow. - If you do not have ldn_mitm installed, connect to the Y-Comm in game or enter LAN mode. This step can be skipped if you already have ldn_mitm installed.
- Enter the local IP of your console into the
IP:field and click theConnectbutton. If done correctly, your console should now be connected to LiveHeX. - At the bottom of the LiveHeX window, open the dropdown menu and select the Raid block that corresponds to the location of your desired raid den.
- Select
Raidif your raid is located in the Wild Area. - Select
RaidArmorif your raid is located in the Isle of Armor. - Select
RaidCrownif your raid is located in the Crown Tundra. - Click
Edit Block, which will then show details of all the raid dens on the map, including the seed.
Figure 2 - LiveHeX Den ID Confirmation

Step-by-Step
- If you have not already thrown a Wishing Piece into the den, close any raid block windows open on LiveHeX and use a Wishing Piece.
- Connect to LiveHeX and open the Raid block subwindow for the correct map.
- Select your Den ID you found earlier. If this is the correct Den ID, you should see the following:
isActiveisTrue.isRareisTrue(purple beam) orFalse(red beam).isWishingPieceisTrue.- Close the Raid Parameter Subwindow by either clicking the X in the top corner or clicking the
Cancelbutton. DO NOT CLICK SAVE.
Pressing the Save button will inject the current seed and any other details back into the Raid Den (very bad). NEVER USE THIS BUTTON TO CLOSE THE RAID PARAMETER SUBWINDOW if you care about the legitimacy of your Pokémon.
Figure 3 - Using a SysBot (Retail Option)

Showing a Pokémon caught from a Max Raid Battle to a SysBot will produce a raid seed and a pk8 file. The pk8 file can be imported into PKHeX to find your internal TID/SID. This is strictly optional however.
Step-by-Step
- Throw a Wishing Piece into the den you wish to seed check.
- Capture the Pokémon from the raid, DO NOT SAVE AFTER THIS POINT.
- Navigate to the server that contains the SysBot, enter the channel for inputting commands.
- Initiate a
seedchecktrade (command syntax may vary between hosts). - Wait for the bot to message you a trade code, then meet with it in-game.
- Show the bot the caught Pokémon and wait for it to message you a den seed.
- Reset the game, you should now be back at the active den and also have your den seed.
I have found my raid seed, I want to go back to the main page!