Static Gift / Encounter RNG (CFW)
What are "Statics"?
As mentioned on the main page, “statics” refer to Pokémon that are encountered or obtained from an NPC in a fixed location and always result in the same species. Static encounters also typically appear as overworld interactions, meaning you directly engage with the Pokémon before the battle begins.
Examples of static encounters include:
- Your starter Pokémon
- Gift Pokémon from other NPCs
- Pokémon from the Celadon City Game Corner
- In-game trades
- Articuno, Zapdos, Moltres
- Entei, Raikou, Suicune
- Ho-Oh, Lugia, Deoxys
- Mewtwo
- Anything else not included in this list that meets the above description.
If your Pokémon is generated by walking randomly by taking steps in grass/caves/water (or by using Sweet Scent/Fishing Rods), you are in the wrong place. Follow the Wild Encounter section of the guide instead.
I am in the wrong place! Send me to Wild Encounters!Figure 1 - Getting Started
Ensure you have progressed far enough in the game to access your desired encounter or gift, you will now need to prepare your bag and party according to the requirements of your target Pokémon. The in-game conditions you need to meet will be slightly different depending on if your target is an encounter or a gift.
Encounter Setup:
- Gather enough bag resources (e.g. Poké Balls, Potions, etc.) to ensure you can handle the encounter.
- Prepare your party with Pokémon that can help streamline the capture process (e.g. False Swipe, status infliction).
- Stand directly outside your target encounter and save the game.
Gift Setup:
- Have at least one spare space in your party for the gift to go into for easier checking.
- If your target is a Game Corner Pokémon, ensure you have enough coins to buy it.
- Stand directly outside your target gift and save the game.
Figure 2 - Delay Calibration
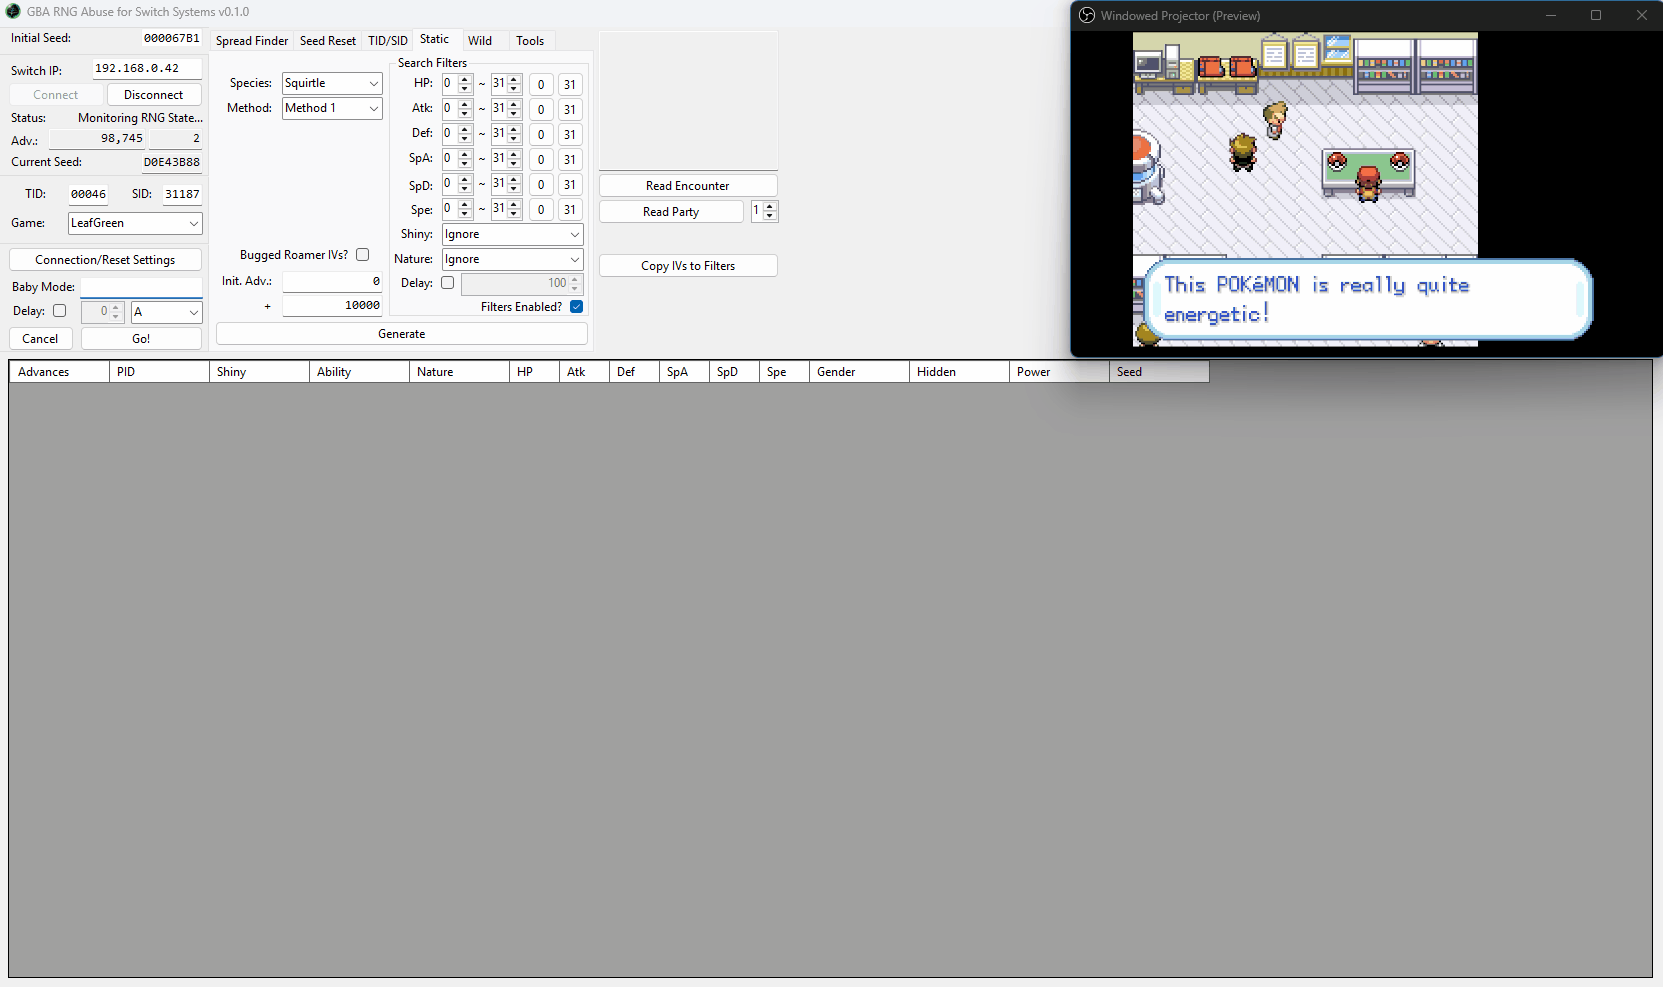
It is a good idea to calibrate your delay before doing anything else - knowing the rough delay value before we move onto actual attempts will help to increase the chances of actually hitting our target seed. Delay will vary depending on the encounter type and location.
To calibrate delay for a specific encounter, pick between manual or automatic calibration and follow the relevant steps. The above example uses automatic calibration (Baby Mode).
Step-by-step (Manual Calibration)
- Launch the game and enter the overworld, then connect to GRASS and open the
Statictab. - Input the details of your target encounter if you have not already done so (species, method, etc.).
- Reach the screen of the final button input for your target (ignore the offset values on this page).
- Press the
Abutton once you reach a round number of advances (such as a multiple of 1,000) of advances for simplicity. - For Ho-Oh specifically you do not press the
Abutton, instead you must pressUPon your controller. - The next step will depend on if you are in an encounter or redeeming a gift.
- For encounters, click the
Read Encounterbutton to read the details of the Pokémon you are in battle with. - For gifts, check which party slot the Pokémon has been sent to and enter the number into the field next to the
Read Partybutton, then click the button. - Click the
Copy IVs to Filtersbutton, then click theGeneratebutton. You should now see the Pokémon you hit in the search results table. - If you do not see your result in the table this is likely because it uses a different generation Method, swap between methods and click
Generateagain to find the correct one. - Confirm the advance that your Pokémon was generated on in the generated table, and subtract it from the advance that you initiated the encounter/redemption on.
- For example, if we initiated the encounter/redemption on advance 2000 and the Pokémon was generated on advance 2,050, our delay for this attempt is 50.
- Repeat this process multiple times until you see a level of consistency in your delay.
- If you are not seeing consistency at all you can consider using the Baby Mode method instead (read below).
Step-by-step (Automatic Calibration)
- Launch the game and enter the overworld, then connect to GRASS and open the
Statictab. - Input the details of your target encounter if you have not already done so (species, method, etc.).
- Reach the screen of the final button input for your target (ignore the offset values on this page).
- In the
Baby Modesection of the main window, enter a round number (such as a multiple of 1,000) inside the empty field and set the correct button input in the dropdown menu. In most cases this should be set toA. - Setting the advance value to a round number helps to maintain consistency and makes calculation slightly easier when calibrating your delay.
- For Ho-Oh specifically, set the button input to
D-UPand check that your in-game settings are not configured toL=A. - Resume the game, then wirelessly connect your controllers and disconnect them immediately afterwards.
- On JoyCons the disconnect button is found on the side of the controller.
- On Pro Controllers the disconnect button is found on the top of the controller.
- This is required for the program to send button inputs to the controller.
- Press the
Go!button in the Baby Mode section of GRASS and wait. The final button input will be pressed automatically on your target advance. - The next step will depend on if you are in an encounter or redeeming a gift.
- For encounters, click the
Read Encounterbutton to read the details of the Pokémon you are in battle with. - For gifts, check which party slot the Pokémon has been sent to and enter the number into the field next to the
Read Partybutton, then click the button. - Click the
Copy IVs to Filtersbutton, then click theGeneratebutton. You should now see the Pokémon you hit in the search results table. - If you do not see your result in the table this is likely because it uses a different generation Method, swap between methods and click
Generateagain to find the correct one. - Confirm the advance that your Pokémon was generated on in the generated table, and subtract it from the advance that you initiated the encounter/redemption on.
- For example, if we initiated the encounter/redemption on advance 2000 and the Pokémon was generated on advance 2,050, our delay for this attempt is 50.
- Repeat this process multiple times until you see a level of consistency in your delay.
Figure 3 - Seed Resetting
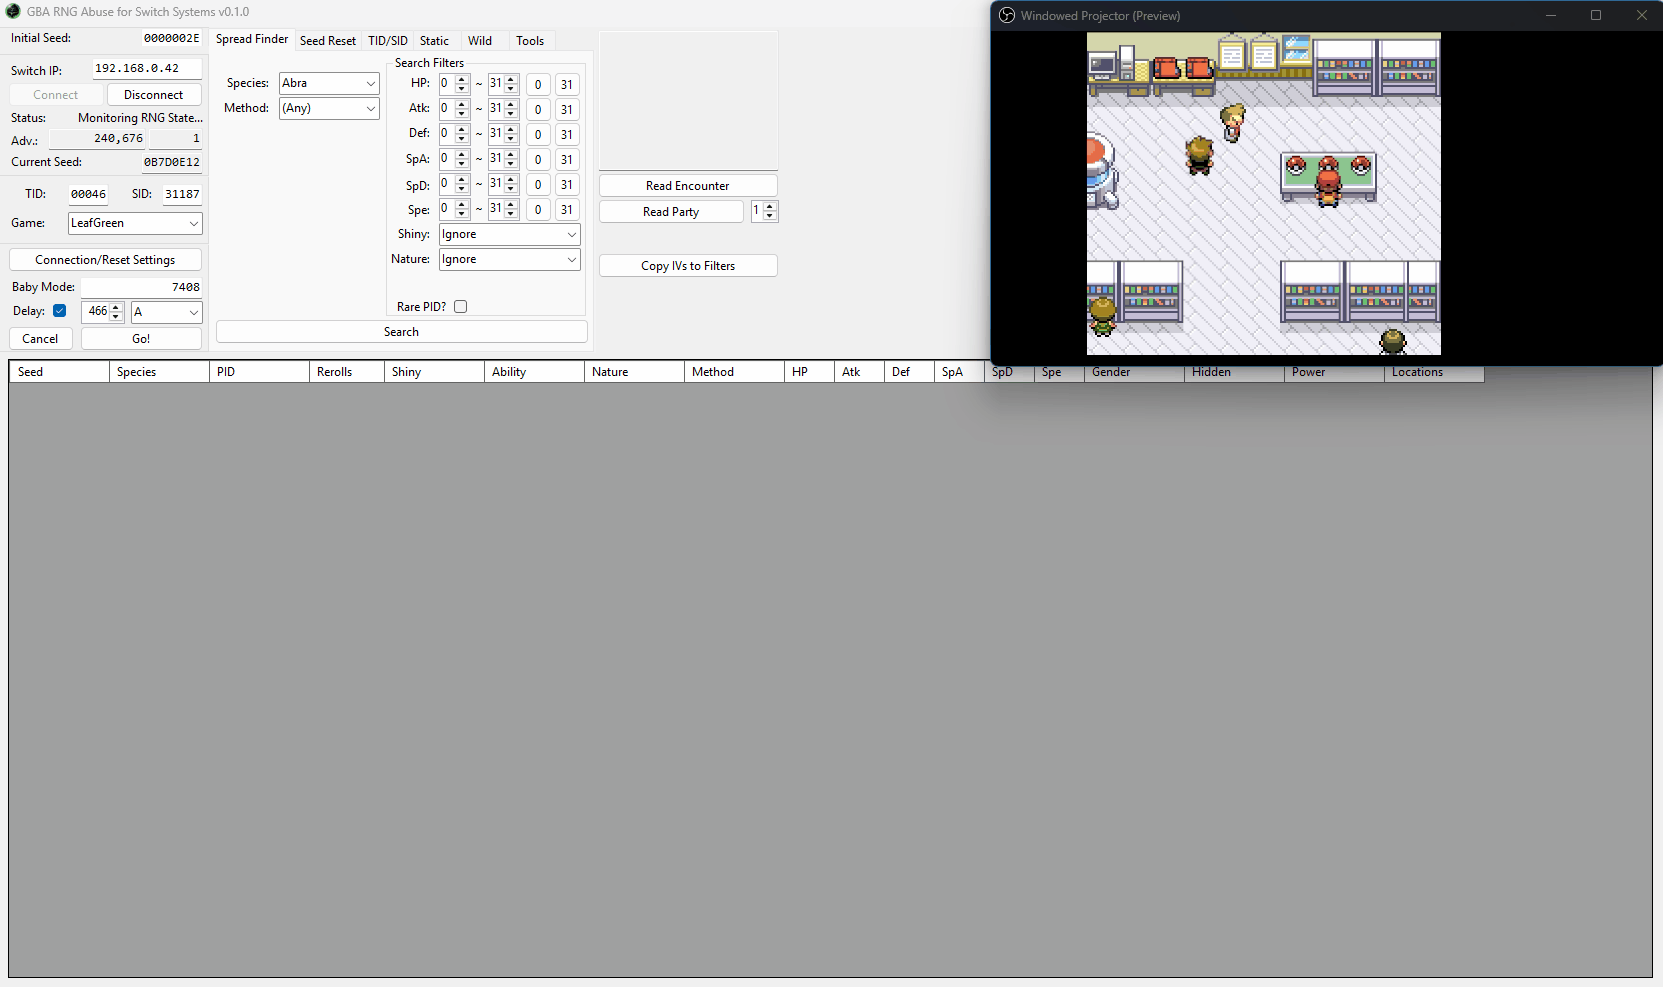
The next steps depend on whether you are targeting a specific spread (for example, specific IVs or a spread made shiny through SID manipulation). If you are, start from Step 1. For targeting a random spread, start from Step 7 instead.
The image above demonstrates the process for targeting a specific spread as we manipulated our SID earlier to make a specific spread generate as shiny, but the steps below should be straightforward regardless of the spread you are targeting.
Step-by-step:
- Open the
Spread Findertab, then search for your target spread. - Right-click your target spread and click
Copy Seed to Clipboard. - Open the
Seed Resettab and paste your seed into theTarget Seedfield. - Next, you can decide how you want the program to search for your seed.
Search by Number of Seedswill calculate the provided amount of initial seeds closest to your target, and tell you the maximum number of advances that you will be waiting from the furthest of those initial seeds.Search by Distance to Targetwill search for any initial seed within the provided number of advances from your target seed, and calculate how many seeds exist in that range. Use this when you don't care as much about how long it takes to find a seed, but know how long you're willing to wait from initial seed to target.Search for Specific Seedswill search for the seeds you provide it with and only those seeds. Use this when you are targeting multiple different spreads and don't mind which one you find an initial seed for first.- You can also calculate the expected number of resets it will take to find your seed by clicking the
Calculatebutton towards the bottom of theSeed Resettab. It is recommended to apply less strict search filters if you are unhappy with the average reset value. - Connect your controller wirelessly, then press the disconnect button on the controller.
- On JoyCons the disconnect button is found on the side of the controller.
- On Pro Controllers the disconnect button is found on the top of the controller.
- This is required for the program to send button inputs to the controller.
- Connect to the program, click
Reset for Seed, then wait until a result is found. - Open the
Statictab, then select your desiredSpeciesandMethod. - Set your search filters, for example filtering for a shiny Pokémon.
- You can be more specific with your search filters if you wish, but keep in mind that if you did not manipulate your SID earlier you will experience limitations on the spreads that are shiny possible.
- If you are not targetting a shiny Pokémon, you can ignore the Shiny filter and simply target a specific IV spread, this will work regardless of if you manipulated your SID or not.
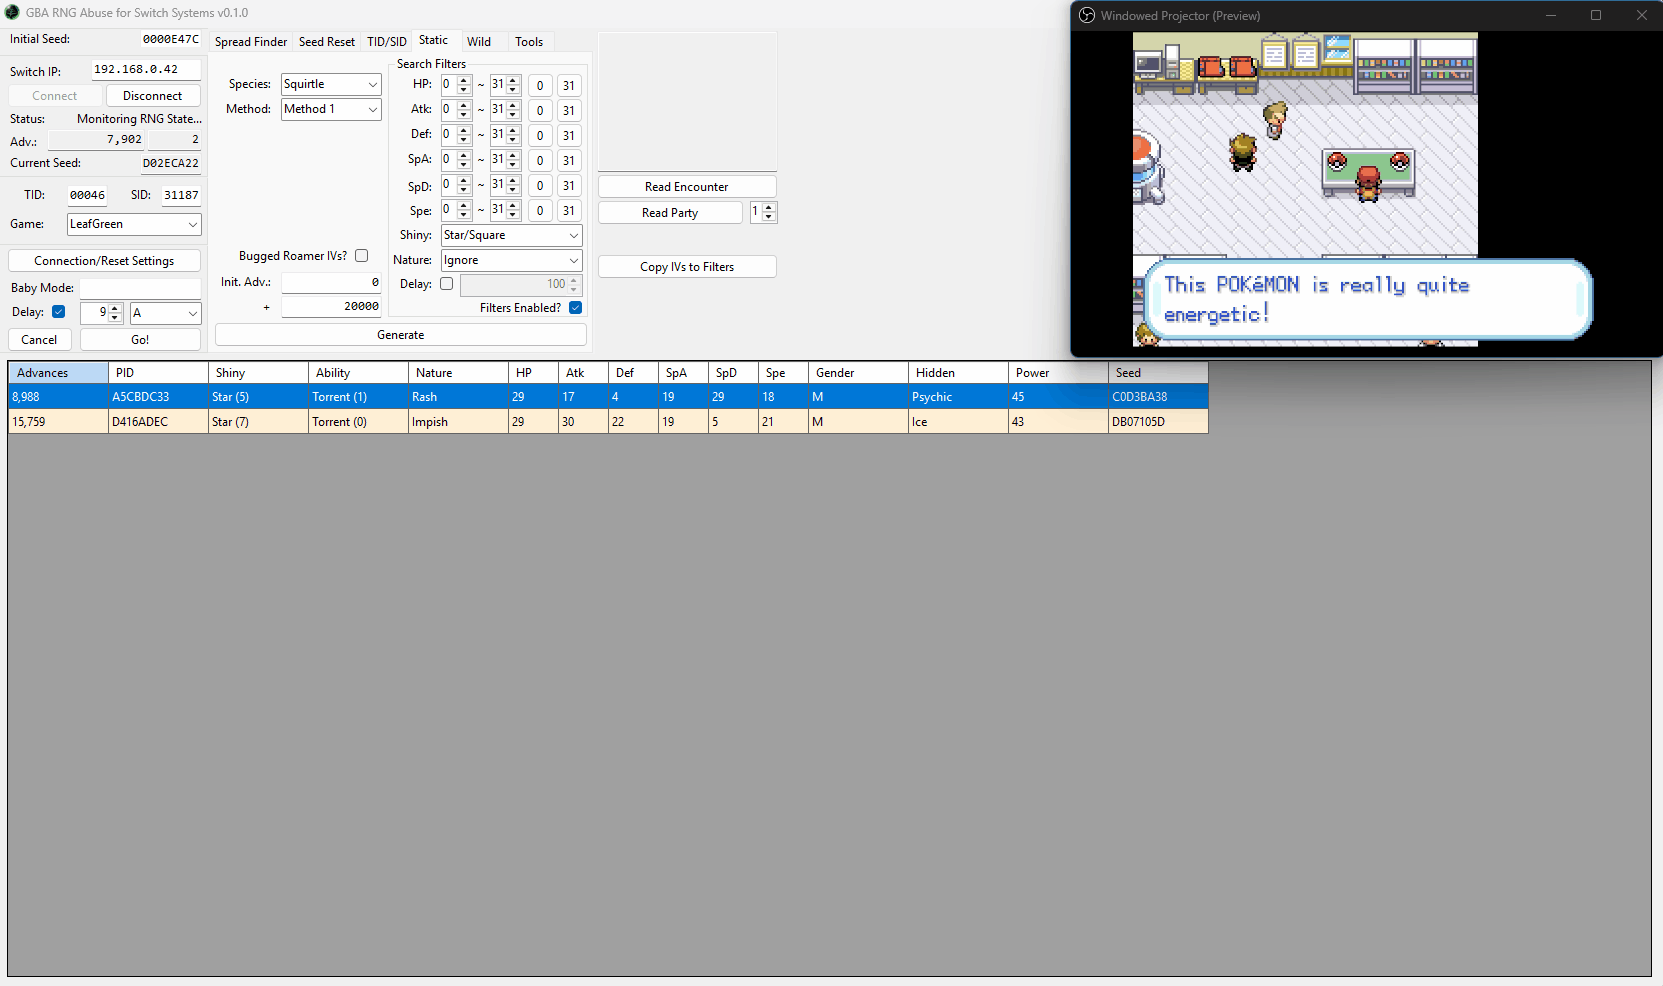
Figure 4 - Target Found / Advancing to the Target

In the above example we can see our target squirtle can be found on advance 8,988, and when calibrating our delay for this gift we were hitting a rough delay of ~9. With this in mind we can now move on to attempting to hit a target frame in practice.
As we used Baby Mode during the delay calibration example we will now need to use Baby Mode again when attempting to hit our target frame in practice. Avoid mixing modes as this will result in delay differences/inaccuracies.
Advancing to the Target (Manual Input):
- Launch the game and advance your seed until you are close to your target advance (within ~20,000 advances away).
- Using the Teachy TV item causes the RNG state to advance very quickly and is accessible shortly after redeeming your starter. Consider using it to advance large distances.
- Baby Mode can also be used to press the
HOMEbutton once you reach a specific advance to avoid overshooting your target. - Head to the location that contains your target, then reach the screen of the final button input.
- Set your delay inside the
Statictab and search for your target again, this will be the advance you will aim to generate the encounter/gift on. - Wait for your target advance, then quickly press whichever button is needed to initiate the encounter or gift redemption.
- The next step will depend on if you are in an encounter or redeeming a gift.
- For encounters, click the
Read Encounterbutton to read the details of the Pokémon you are in battle with. - For gifts, check which party slot the Pokémon has been sent to and enter the number into the field next to the
Read Partybutton, then click the button. - Confirm that the Pokémon matches what is expected, adjust the delay accordingly if you are consistently missing your target.
- Undershoot = Decrease Delay
- Overshoot = Increase Delay
- Repeat the process until you hit the correct target seed and generate the correct Pokémon.
Advancing to the Target (Baby Mode):
- Launch the game and advance your seed until you are close to your target advance (within ~20,000 advances away).
- Using the Teachy TV item causes the RNG state to advance very quickly and is accessible shortly after redeeming your starter. Consider using it to advance large distances.
- Baby Mode can also be used to press the
HOMEbutton once you reach a specific advance to avoid overshooting your target. - Head to the location that contains your target, then reach the screen of the final button input.
- Set your delay and button input inside the
Baby Modesection, this should be set according to earlier delay calibration setup. - Connect your controller wirelessly, then press the disconnect button on the controller.
- Enter your target advance into the Baby Mode field, then click
Go!and wait for the bot to automatically redeem/encounter the Pokémon. - For encounters, click the
Read Encounterbutton to read the details of the Pokémon you are in battle with. - For gifts, check which party slot the Pokémon has been sent to and enter the number into the field next to the
Read Partybutton, then click the button. - Confirm that the Pokémon matches what is expected, adjust the delay accordingly if you are consistently missing your target.
- Undershoot = Decrease Delay
- Overshoot = Increase Delay
- Repeat the process until you hit the correct target seed and generate the correct Pokémon.
Information - For consistency, you will almost always want your delay to match the parity (odd or even) of your target advance. In practice, this means that if your target advance is odd, your delay should also be odd, and if your target advance is even, your delay should also be even.
In the Switch ports, overworld seed advances typically progress 2-by-2 rather than 1-by-1 like the original GBA versions, so your delay will usually be an even number. If your current advance has the wrong parity, you can often change it by opening and closing the party menu or another start menu option.Figure 5 - Target Hit
After initiating the encounter/redemption process and reading the details of the Pokémon, you should see that the correct Pokémon was generated. This confirms that the manipulation was successful!